Four simple document binding options explained
Friday 30 October 2020
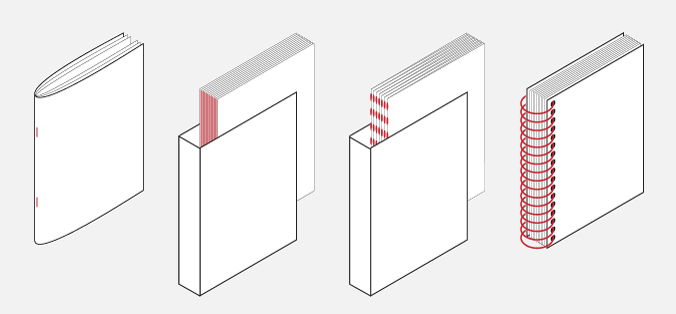
Four simple binding methods, from left to right, saddle stitched, perfect bound, section sewn, and Wire-O bound
Friday 30 October 2020
Four simple binding methods, from left to right, saddle stitched, perfect bound, section sewn, and Wire-O bound
Binding a multi-page document transforms a series of two-dimensional printed sheets into a three-dimensional object. And the binding you choose contributes to the aesthetic and practical qualities of the finished product.
A creative binding will lift a publication out of the ordinary, lending it prestige and importance and helping it to stand out. But bindings should also be practical, making publications easier to store, find and use.
The vast majority of documents will use one of four straight-forward binding options, explained below.
Saddle stitching is the industry name for stapling. All the pages (including the cover) are folded over a ‘saddle’ and short lengths of steel wire are punched through the fold fastening everything together.
Pros: Low cost. Most documents will open relatively flat.
Cons: Only suitable below a certain overall thickness. Thicker publications may not close properly. No spine which makes them harder to identify when stored on a bookshelf
Make saddle-stitching more interesting by specifying a different wire colour. The industry standard is silver, but stitching wire is available in a range of metallic and solid colours which can look very striking.
Side stitching is a variation on this technique where the wire stitch passes through the full thickness of the publication parallel to the spine – like a cheque book. Side stitched documents never open flat.
The pages of a perfect-bound document are held together with glue. The inside pages are gathered together and the spine edge is shredded to make it rough before the glue is applied. A softcover is added afterwards. Paperback books and magazines are often perfect-bound.
Pros: Relatively inexpensive. A relatively square spine.
Cons: The pages are not very firmly held, and will eventually fall out. Will not open completely flat – at least not without risking the pages coming away from the adhesive.
There is a longer-lasting version of perfect binding, which uses a stronger adhesive, and is called PUR (Polyurethane Reactive Hotmelt) binding. PUR binding is more secure and long-lasting, making it suitable for premium publications which need to have a longer shelf-life.
As the name suggests, sub-sections of the publication are sewn together with thread. They are then assembled in order and glued along the spine before finishing with a cover – often a hard case binding. Hardback books and other documents which need to last or which require a premium feel are often section sewn.
Pros: Optimum strength and durability. A good spine.
Cons: Higher cost in comparison to perfect/PUR binding.
All the individual pages (including the cover) are gathered together and a series of small holes are punched through the sheets along the binding edge. The Wire-O binding is then threaded through and closed into position.
Pros: Opens completely flat.
Cons: No spine. Can be hard to store on a bookshelf.
There are many variations on Wire-O binding, most of which aim to overcome the problem of not having a spine. Some variations place the Wire-O inside the cover. Others have an extended front cover which wraps around the fore-edge of the publication. More complex Wire-O binding is likely to be significantly more costly to produce.
It’s best to decide on the binding method as early as you can. Your choice will affect the amount of space you need to leave clear for the binding, provide a minimum/maximum page extent, and will impact upon the project's budget.
Firstly, consider the intended use of your publication: will it be kept for a long time? Will it be opened and closed a lot? Will users need to write in it, or refer to it while engaged in another activity, e.g. cookery books?
Next, consider the impact you want to make. Do you want to create a premium-looking finished product? Do you want it to look substantial?
On a practical level, the method you use is, to some extent, dictated by the anticipated thickness of the document, which is determined by a combination of page count, and paper thickness. Perfect binding is only possible above a certain spine width. And wire stitching is only possible below a certain thickness. Check with your preferred supplier what their threshold levels are.
To get an idea of the likely thickness of your job, try using an online calculator. If you’re close to the minimum/maximum cut-off, then speak to your supplier, and request a dummy using your intended materials and binding method. You can then decide whether you need to adjust the bulk of the paper you’re using to increase/decrease the overall thickness of the booklet.
Just get in touch.
Related posts
How to use paragraph styles
22 February 2019
Typesetting – the finishing touches
26 February 2016
Seven steps to more professional typesetting
22 May 2015
![]() Recent posts
Recent posts
![]() Featured posts
Featured posts
Briefing a designer
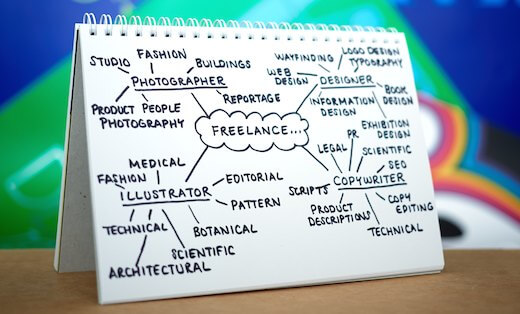
Eight reasons to use freelance creatives
Putting a freelance designer at the heart of your project

Hello! I’m Sarah, an independent typographic designer, helping businesses to communicate their unique selling points through printed marketing and communications.
I’ve been sharing my knowledge about design, typography, marketing, branding and printing since 2014. I hope you enjoy reading my blog.

Sarah Cowan